Attic Gym

The completed floor with rubber mats installed.
Summary: This page documents building an attic gym at my Dad's home in the countryside in Slovenia. I had two principal goals:
- To build an elastic, "bouncy" floor to absorb the impact of weights and plyometric exercises while training
- To take advantage of the exposed structural posts and beams supporting the timber-framed roof for mounting exercise equipment like pull-up bars, cables, etc.
The basic form factor is a 5 m x 5 m square of rubber floor mats placed on a subfloor grid designed for elasticity and impact absorption, with various pull-up bars and climbing accessories mounted to the beams and equipment stored around the perimeter.
Preparation...
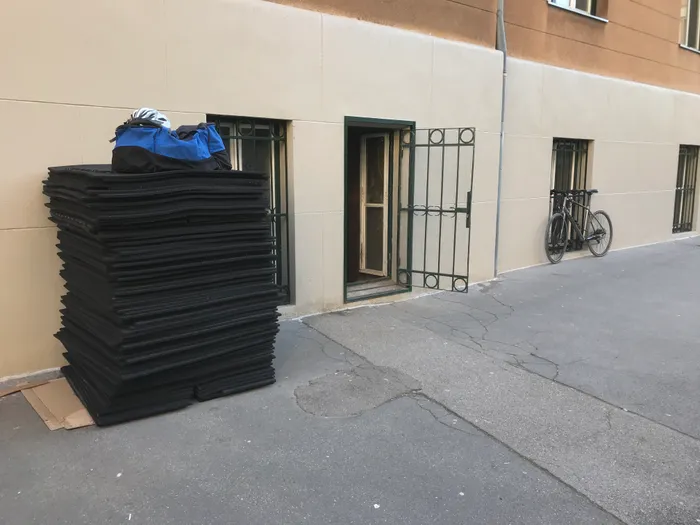
Rubber matting fresh out of the van, stacked outside the basement of my city apartment in Ljubljana, ready to be taken inside for storage.
Fun story: I needed rubber floor mats and found a gym that was unexpectedly relocating and had to sell their practically new rubber floor on short notice. Negotiated a good price—on the condition that I take all 100 square meters (far more than needed!) and emptied the place precisely on the evening of their move-out day.
So I rented a van for their move-out day, carried the flooring out of the gym up the basement stairs, loaded up the van, and took the load to the basement at my city apartment for storage. And that's how I ended up with about 1500 kg of SBR tiles stacked outside my building's basement. Turns out there is a good market for used rubber gym mats in Slovenia, and I was fortunately able to sell the excessive for double what I bought it for, so the floor basically paid for itself.
Aside: rubber mats are difficult to carry in bulk! SBR rubber is relatively heavy—about 1000 kg per cubic meter, the same density as water—so each 1 m x 1 m x 15 mm tile is 15 kg or so, and floppy. I found the best compromise was to carry two tiles at a time, folded over your head like a hat.
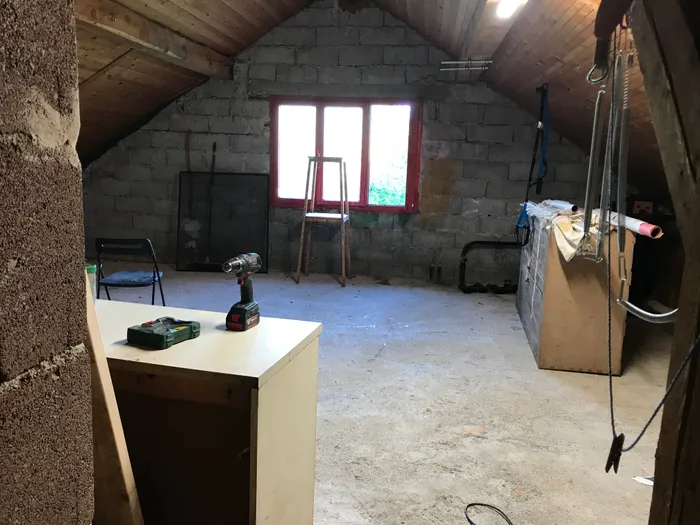
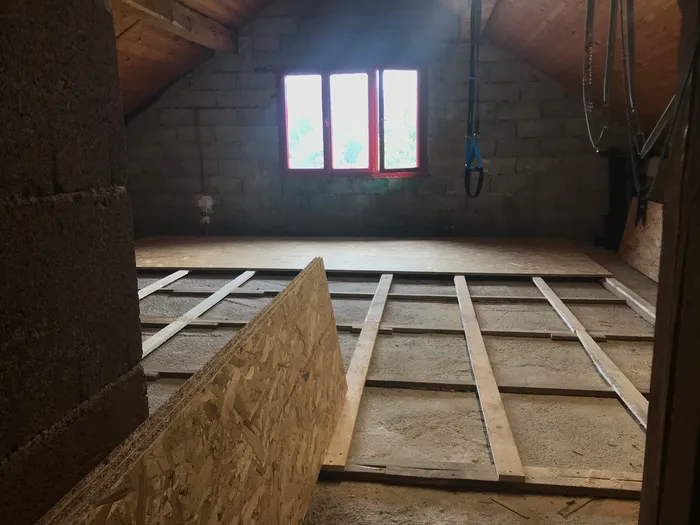
The (mostly) empty attic space where gym will go.
The gym is built on our farm in the countryside on a concrete slab in the attic of the old house. We had moved in relatively recently and the attic was still full of clutter—a combination of our unpacked moving boxes, the previous owners' left-behind stuff, and miscellaneous construction waste. I spent evenings in the winter clearing clutter out of the attic and sorting through moving boxes while listening to Wayne Gorbea! That opened up a nice 30 square meters or so of space for the gym.
You can see a picture of the (almost) emptied attic space above. on the left. If you squint you miss the large closet lying on its side on the floor, still waiting to be moved downstairs.
Subfloor technical details
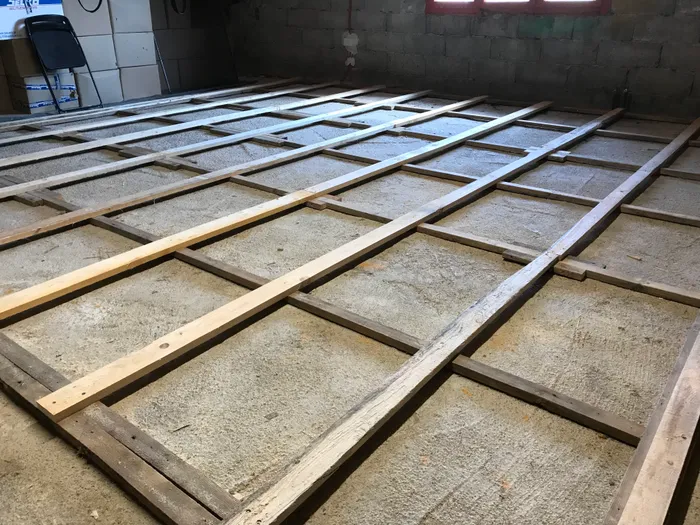
The bottom layer of the sleeper grid (with the soon-to-be-installed second layer of perpendicular slats on top). The assembly was shimmed to level, then covered with OSB panels.
The gym floor is a 5 meter by 5 meter square covered in SBR rubber mats placed on a subfloor of OSB panels on a doubled grid of wooden sleepers.
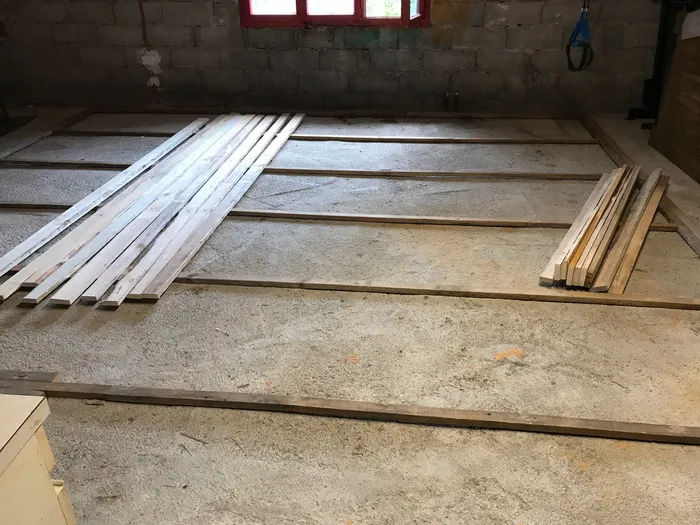
The bottom layer of the sleeper grid is recycled from salvaged roofing slats left over from when we re-roofed the barn. The slats are roughly 3 cm x 5 cm in cross section and 3-4 meters in length (i.e. less than the 5 meter length/width of the floor) and had to be spliced to reach 5 meters, as shown in the plans below. The slats were shimmed to level, then covered with a second layer of perpendicular slats, followed by OSB panels. More in the pictures below.
Below are the CAD drawings I used to plan the subfloor. I used a 625 mm modular dimension to match the standard 625 mm width of OSB panels in the EU, which also (intentionally!) divides cleanly into the 5 meter length and width of the floor (8 panels are exactly 5 meters wide).
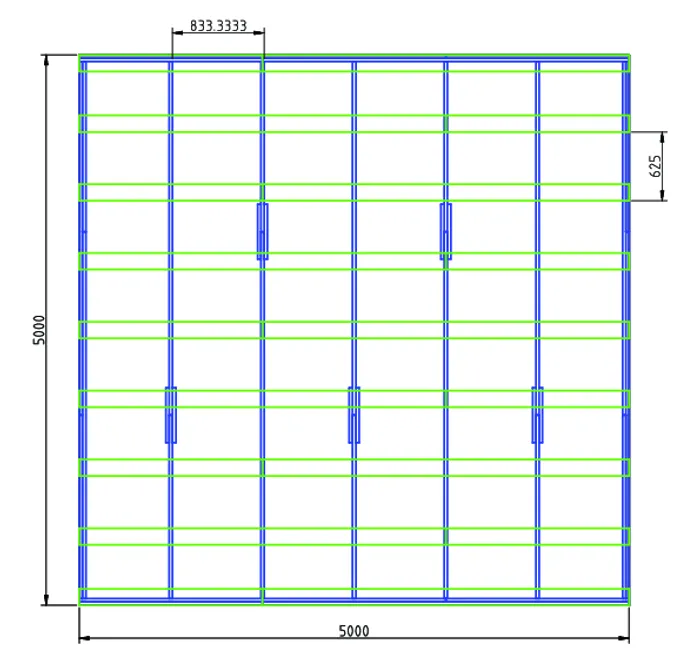
Plans for the grid of sleepers, made of two perpendicular layers of slats (dimensions in millimeters). The 625 mm on-center spacing accomodates the future OSB panels.
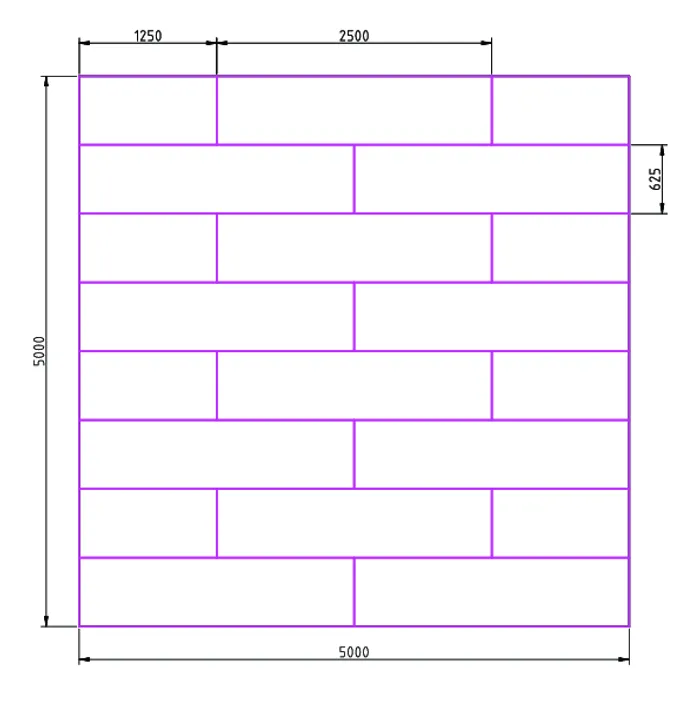
Layout of the OSB panels placed on top of the sleepers (dimensions in millimeters). I used standard 2500 mm x 625 mm panels. The joints are staggered for improved strength.
Plans for the grid of sleepers, made of two perpendicular layers of slats (dimensions in millimeters). The 625 mm on-center spacing accomodates the future OSB panels.
Layout of the OSB panels placed on top of the sleepers (dimensions in millimeters). I used standard 2500 mm x 625 mm panels. The joints are staggered for improved strength.
The top layer of the sleeper grid, made of 1 inch thick spruce. OSB panels go on top.
The second layer of the sleeper grid is made from 1-inch thick spruce planks. Again, this is "salvaged" wood: the planks are left over from when we milled wood the previous spring—they were too narrow to be practically useful as siding, but worked well as sleepers to support OSB panels.
The planks are placed 625 mm on-center to accommodate the 625 mm wide OSB panels that go on top. (625 mm is the standard modular dimension for many panel products in the EU, analogous to the 16 inch modular dimension used in the USA.)
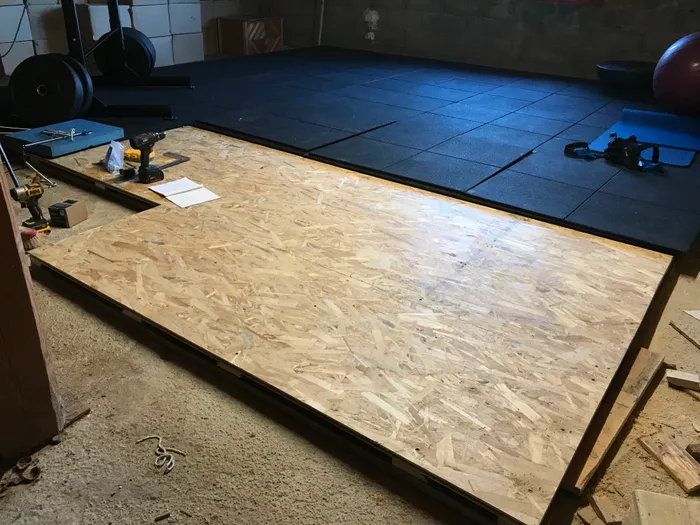
In the process of installing OSB panels over the sleeper grid.
The top layer of the subfloor is made of OSB panels. I used 625 mm x 2500 mm x 22 mm tongue and groove OSB panels. The panel joints are staggered for better strength, and the tongues and grooves on the panels help tie the individual panels into a unified planar structure.
In the process of laying the final layer of rubber mats on top of the OSB subfloor.
The final layer is a rubber floor, which provides a shock-absorbent, non-slip surface for training. The floor consists of 1 m x 1 m x 15 mm panels made of SBR rubber granules bound in a polyurethane resin. The mats are placed on top of the OSB. No adhesive was needed—the relatively high coefficient of friction between the mats and subfloor keeps the mats in place.
A picture of the complete gym floor with the first pieces of equipment already in.
And that's all for now! You can see a picture of the complete gym above on the right. The floor works great — it absorbs impact, has a pleasant slight bounce to it, and is a pleasure to train on. I'm pleased with how the project turned out.